how to make melodiesWITH A STRIP PAPER MUSIC BOX MECHANISM
Here you will learn how to transform your song into a music box. We will show you how to make a musical arrangement so that you can make it play on a paper strip mechanism.
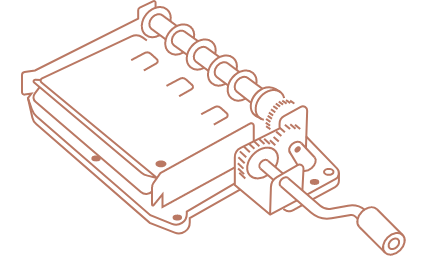
What is a paper strip mechanism
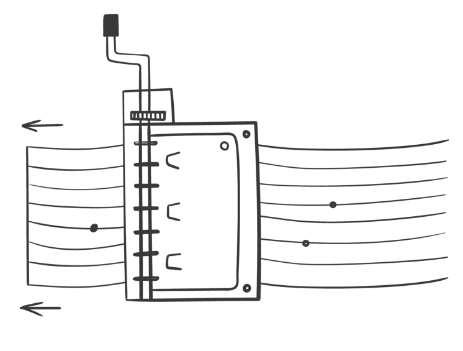
A musical paper strip mechanism is a type of musical mechanism that works by inserting a perforated paper strip and turning a crank to make the paper pass through. The holes in the paper strip will activate pins that will vibrate a musical comb. Although the first instrument with a similar operation was the pianola, developed in the mid-19th century, the paper strip musical mechanism was created by Sankyo 100 years later, in the 1970s.
How to customize a song on a paper mechanism
While cylinder mechanisms (crank and wind-up) can only be customized in a factory, mechanisms that work with a strip of paper can be customized by anyone with musical knowledge. This allows you to play many songs with a single mechanism, customizing only a strip of paper through holes made with a die cutter.
The way in which we make the musical arrangement from the original song will be very important when it can later be transferred to the paper strip mechanism.
Strip paper mechanisms types
There are mainly two types of paper strip mechanism that differ only in the number of notes they can play:
20 notes mechanism
It has 20 diatonic notes

30 notes mechanism
It has 30 diatonic notes

Where to buy this type of mechanism
You can find in our online store paper strip mechanisms of 20 and 30 notes.
All the mechanisms we offer are tested beforehand to ensure that they work and sound correctly all their notes.
To make the songs you can buy 20-note paper or 30-note paper by following these links.
Starting with the arrangement
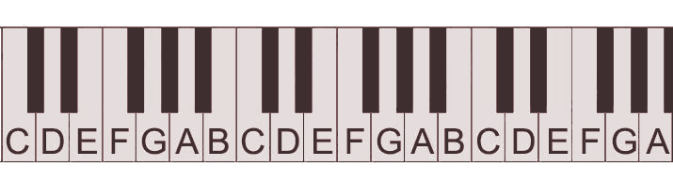
From here we will have to delimit the maximum range of the arrangement. As a general rule (there may be exceptions) the ideal would be to transpose the song to C major, since both mechanisms are designed to play songs in this key.
As for the rhythm, the crotchet pulse should ideally be at a speed between 40 and 75. Above 75 you may have to turn the crank too fast to get the same speed as in the original song. If the song is at crotchet=90, it is preferable to try to make an arrangement at crotchet=45, halving its figures (from half note to quarter note, from quarter note to eighth note, etc.).
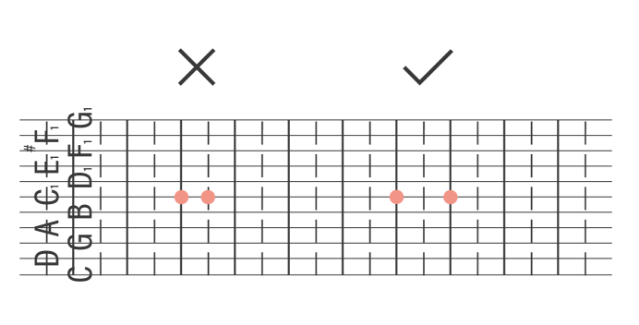
The next step is to transcribe the song from a midi, a score, or an audio. You can write it by hand on a staff or using music editing software like Finale or Musescore, this way you can hear the result. In both cases, we have to take into account the melodic (range and notes) and rhythmic limitations of the mechanism (you cannot put two identical notes in two consecutive vertical lines. If this happens, the second note will have to be replaced by another or double the value of all rhythmic figures).
Therefore, the minimum space that must exist between two equal notes (for example A followed by another A) must be one eighth note (2 spaces). If you put two notes closer together than that, only the first note will be heard.
It is important, once the arrangement is done, to check that all the written notes exist in the mechanism. To help you in the process, you can use online tools to simulate a die-cut paper strip, such as:
- Musicboxmaniacs
- Free
- You can share your song and download others songs from other users
- For all types of paper strip mechanisms
- Jelly
- Not free
- For PC and mobile
- Musicbox fun
- Free
- You can only save your song by saving the browser address as you make changes
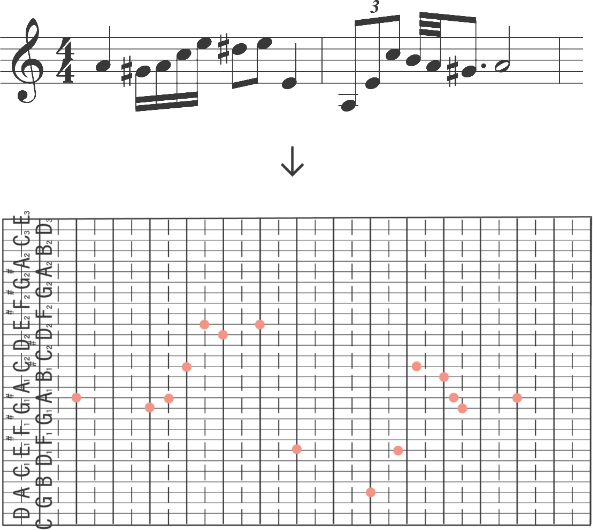
The next step is to transfer the score to the strip of paper.
The strips of paper in horizontal position are divided by a grid, where the vertical lines represent the time and the horizontal lines represent the pitch of the note.
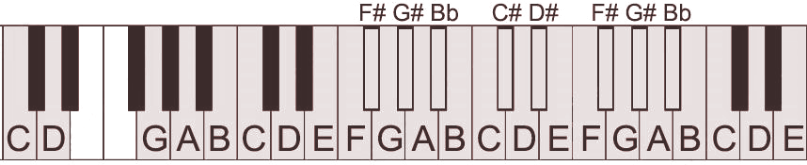
The music will sound from left to right if the paper is placed so that the order from bottom to top of the notes is “C-D-G-A…” (30 notes) or “C-D-E-F…” (20 notes).
Each vertical division represents the space of a semiquaver. Thus, 2 spaces will correspond to an eighth note, 3 lines to a dotted eighth, etc. Based on this information, the musical information will be written on the paper strip.

We recommend drawing vertical lines on the paper strip that represent the measures, along with their number. This way, you will see the musical information much more quickly and easily.
It may be difficult to know which note each horizontal line corresponds to in certain parts of the paper strip. To make this process much simpler, you can cut out the part where the names of the notes appear to place it anywhere on the paper strip and quickly know which note a line corresponds to.
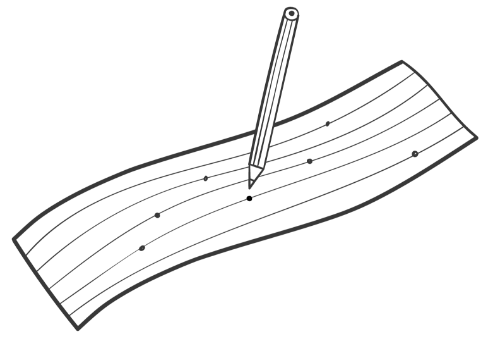
Start small: mark some points, punch some holes and try it out on the mechanism. If you are using 30-note paper, calculate the length of the paper strip beforehand and cut it to that length, so that you don't have to pull meters and meters of paper through the mechanism to get it out while testing your song. To remove the paper quickly, you can stretch from the back end. You should never try to pull the paper strip out by stretching from the front and causing the paper to move backwards.
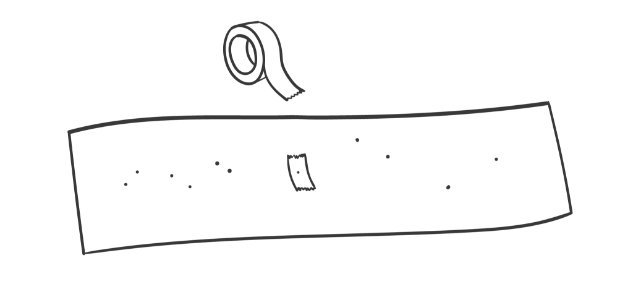
Once all the dots have been marked, the punching machine is used to punch holes in the paper strip. It is very important to make the holes as precisely as possible, because if they deviate it is possible that the note will not sound.
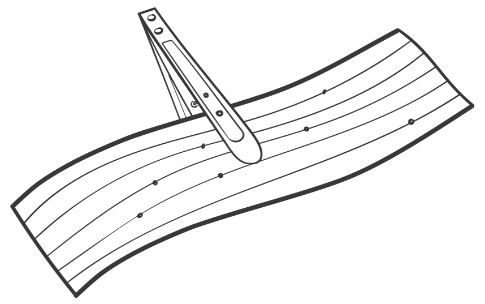
In the event that a hole has been made accidentally, it can be solved by putting some tape on the back of the hole (back of the strip), thus covering the hole.
How to extend the duration
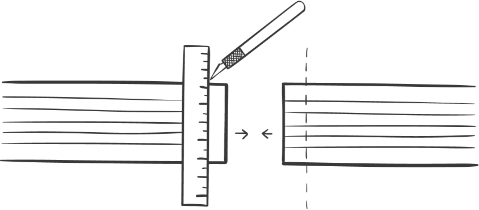
This is only valid for 20-note mechanisms, as the paper for 30-note mechanisms can measure several meters. The paper strips for 20-note mechanisms measure approximately 50 centimeters. If you need to extend its length, it can be done by joining two strips of paper with a bit of tape. To do this you will have to cut with a cutter and a ruler the end of the first strip and the beginning of the second one. It is very important that this union is made as precisely as possible.
The tape should be as thin as possible. It is not recommended to do this as depending on how this is done and the thickness of the tape, the mechanism may be forced as the tape passes through it, and the sprockets may break. The warranty does not include this breakage as it is not recommended.
How to play the music
This is the easiest and most fun part of the process. We recommend cutting the end of each song into an arrow shape with a flat tip. This way, it will be much easier to insert the paper into the mechanism.